Settings
The Settings screen contains options for managing your account, your subscription and billing info and various other things.
Account
To get to the account settings, select the main menu, then . Here you can update your display name, log out of your account or delete it altogether.
Change Your Display Name
Your display name is what other Padloc users will see next to your email address if your are a member of any organizations. To change your display name, simply enter the updated name, then click to confirm the change.
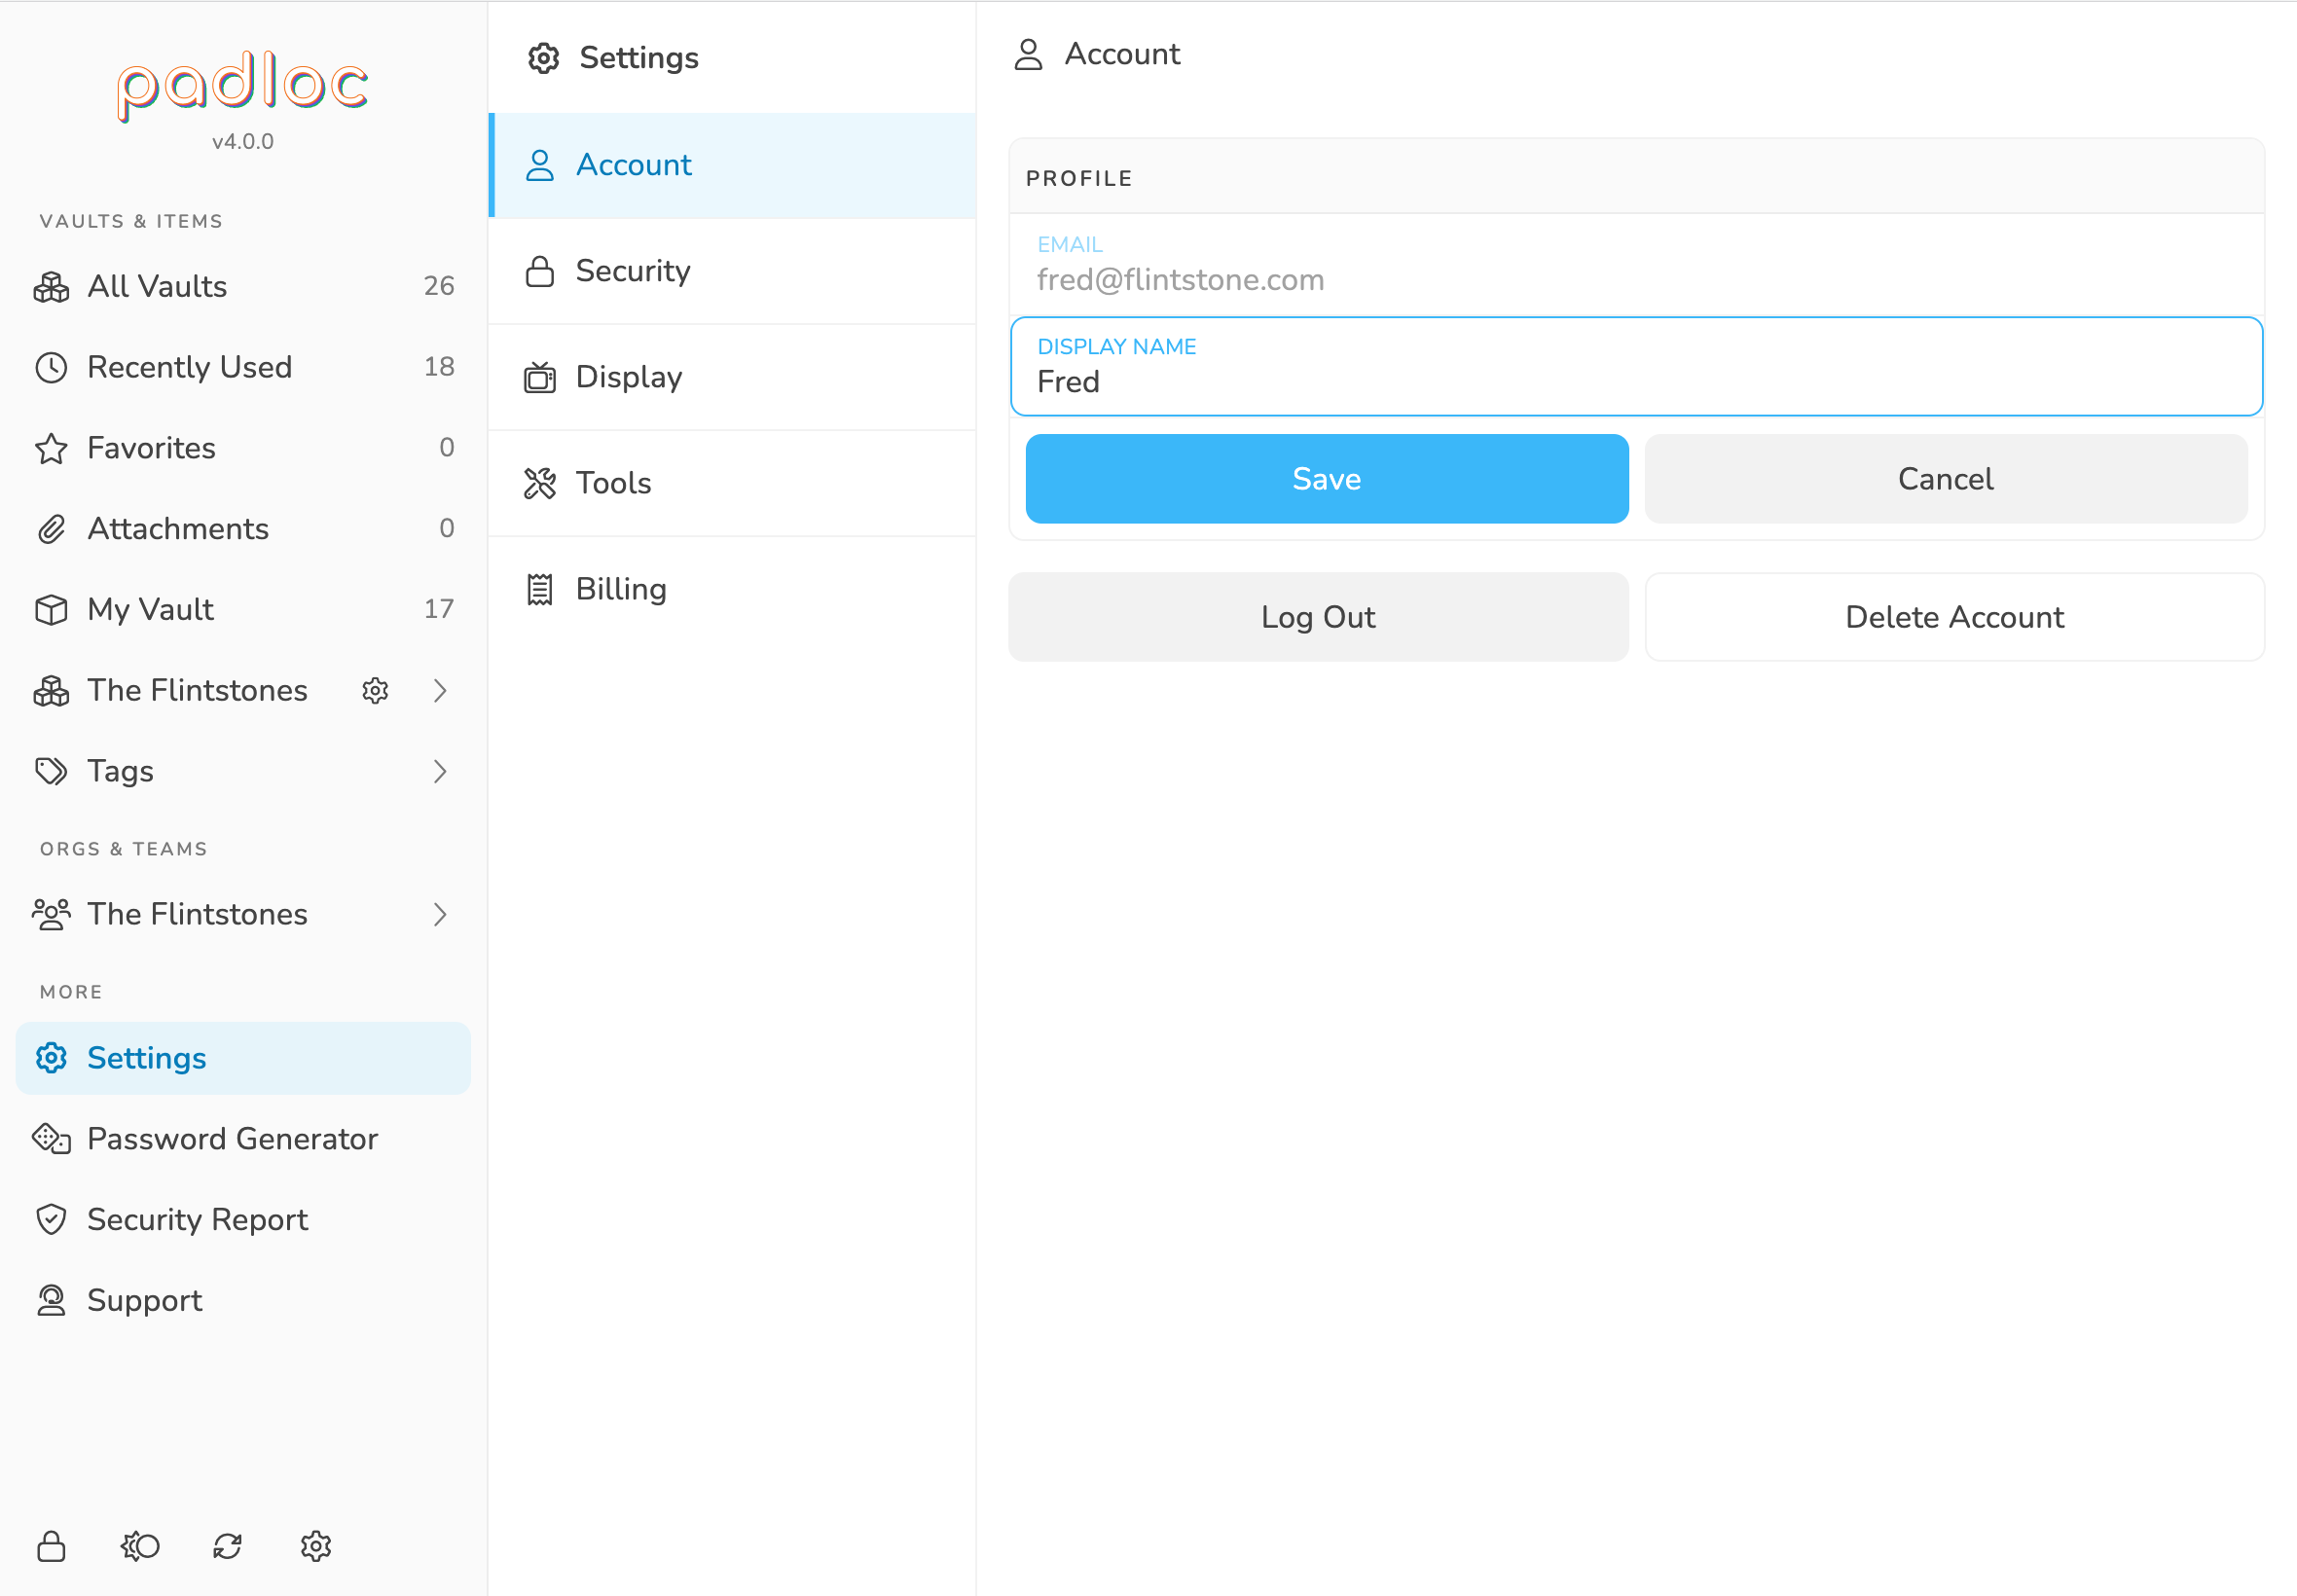
Log Out
To log out of your Padloc account, go to the account settings, then click the button labeled . This will delete all your locally stored data and bring you back to the login screen.
Deleting Your Account
Important: Deleting your account will cancel any active subscriptions and permanently erase all your data from Padloc, including all organizations owned by you and associated data. This action is not reversible!
To delete your Padloc account, go to the account settings, then click the button labeled . You'll have to enter your master password, then confirm your choice by typing out the word "DELETE" and hitting .
Security
To get to the security settings, select the main menu, then . Here you can change your master password, manage sessions and MFA methods, and more.
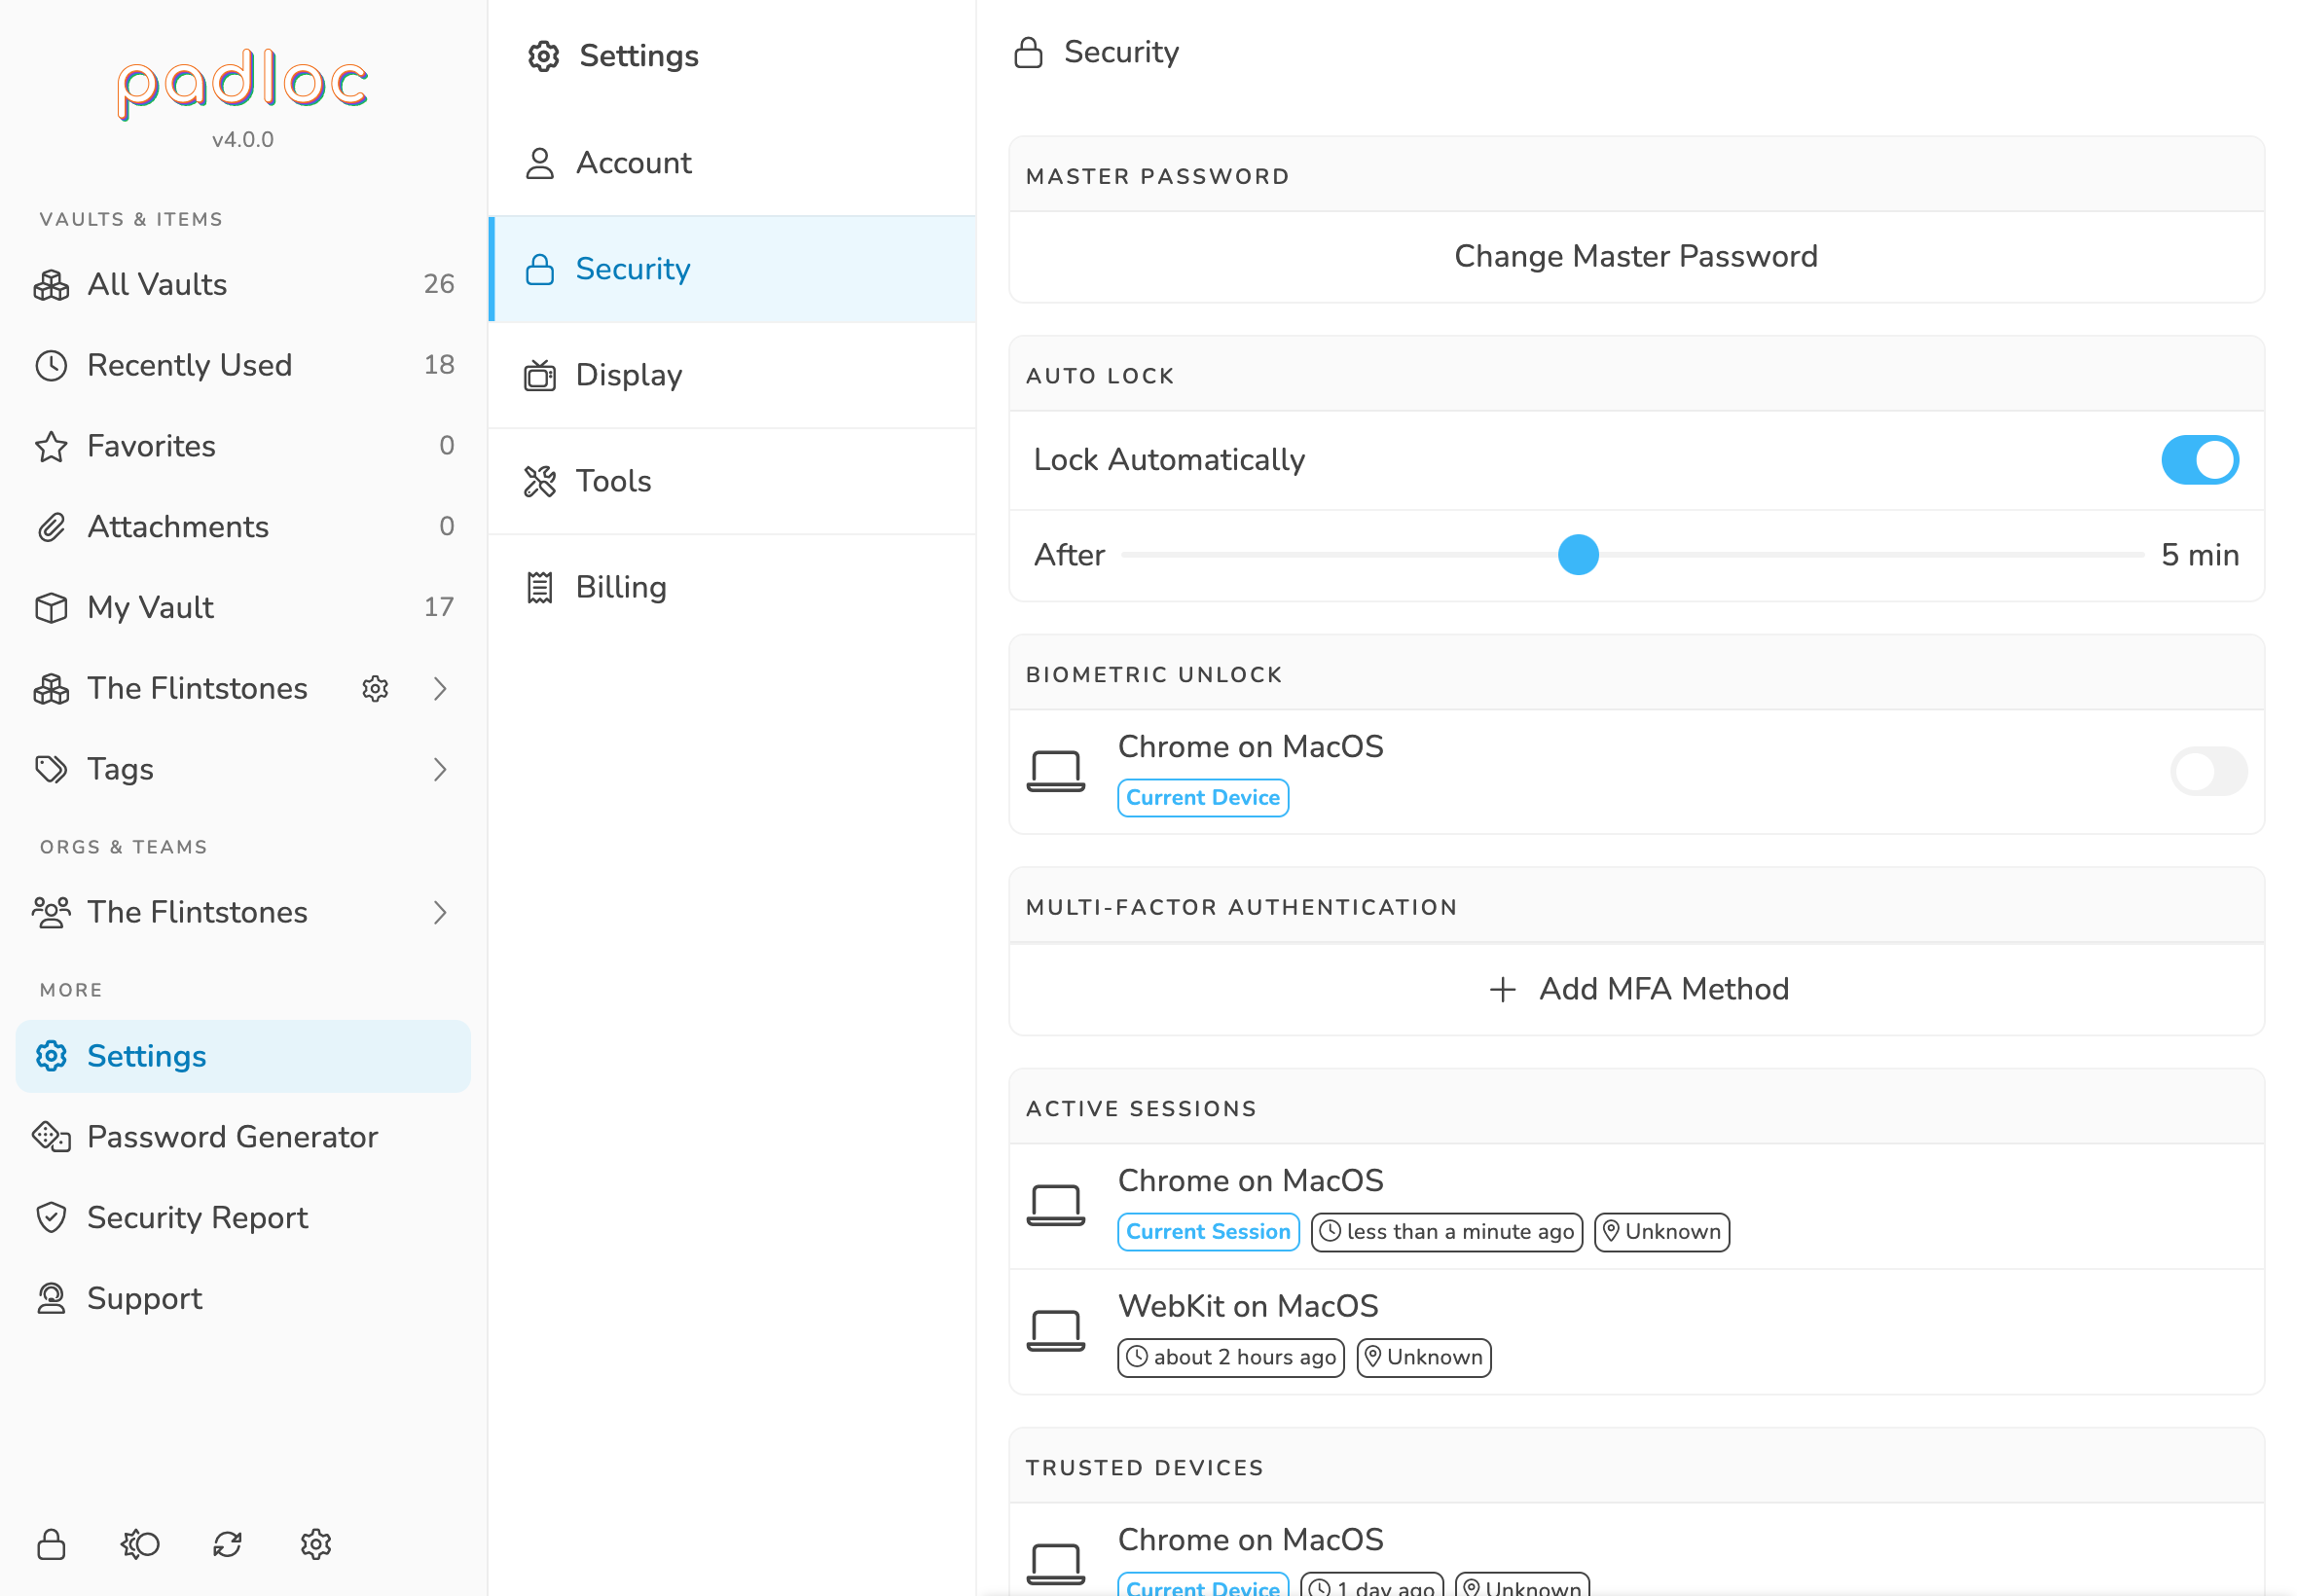
Changing Your Master Password
To change your master password, go to the security settings, then click the button labeled . After entering your current password, enter your new password and confirm it by retyping it in the input below. To confirm the change, click .
Auto Lock
The Auto Lock feature allows you to configure whether you want to Padloc to automatically lock after a certain period of inactivity (no interaction with the app). To enable or disable the feature, simply toggle the button labeled . To adjust the duration after which the app should auto-lock, drag the slider right below the button.
You can read more about the security about locking and unlocking here.
Display
The display settings allow you to make various adjustments to Padloc's appearance and user experience. To get to the security settings, select the main menu, then .
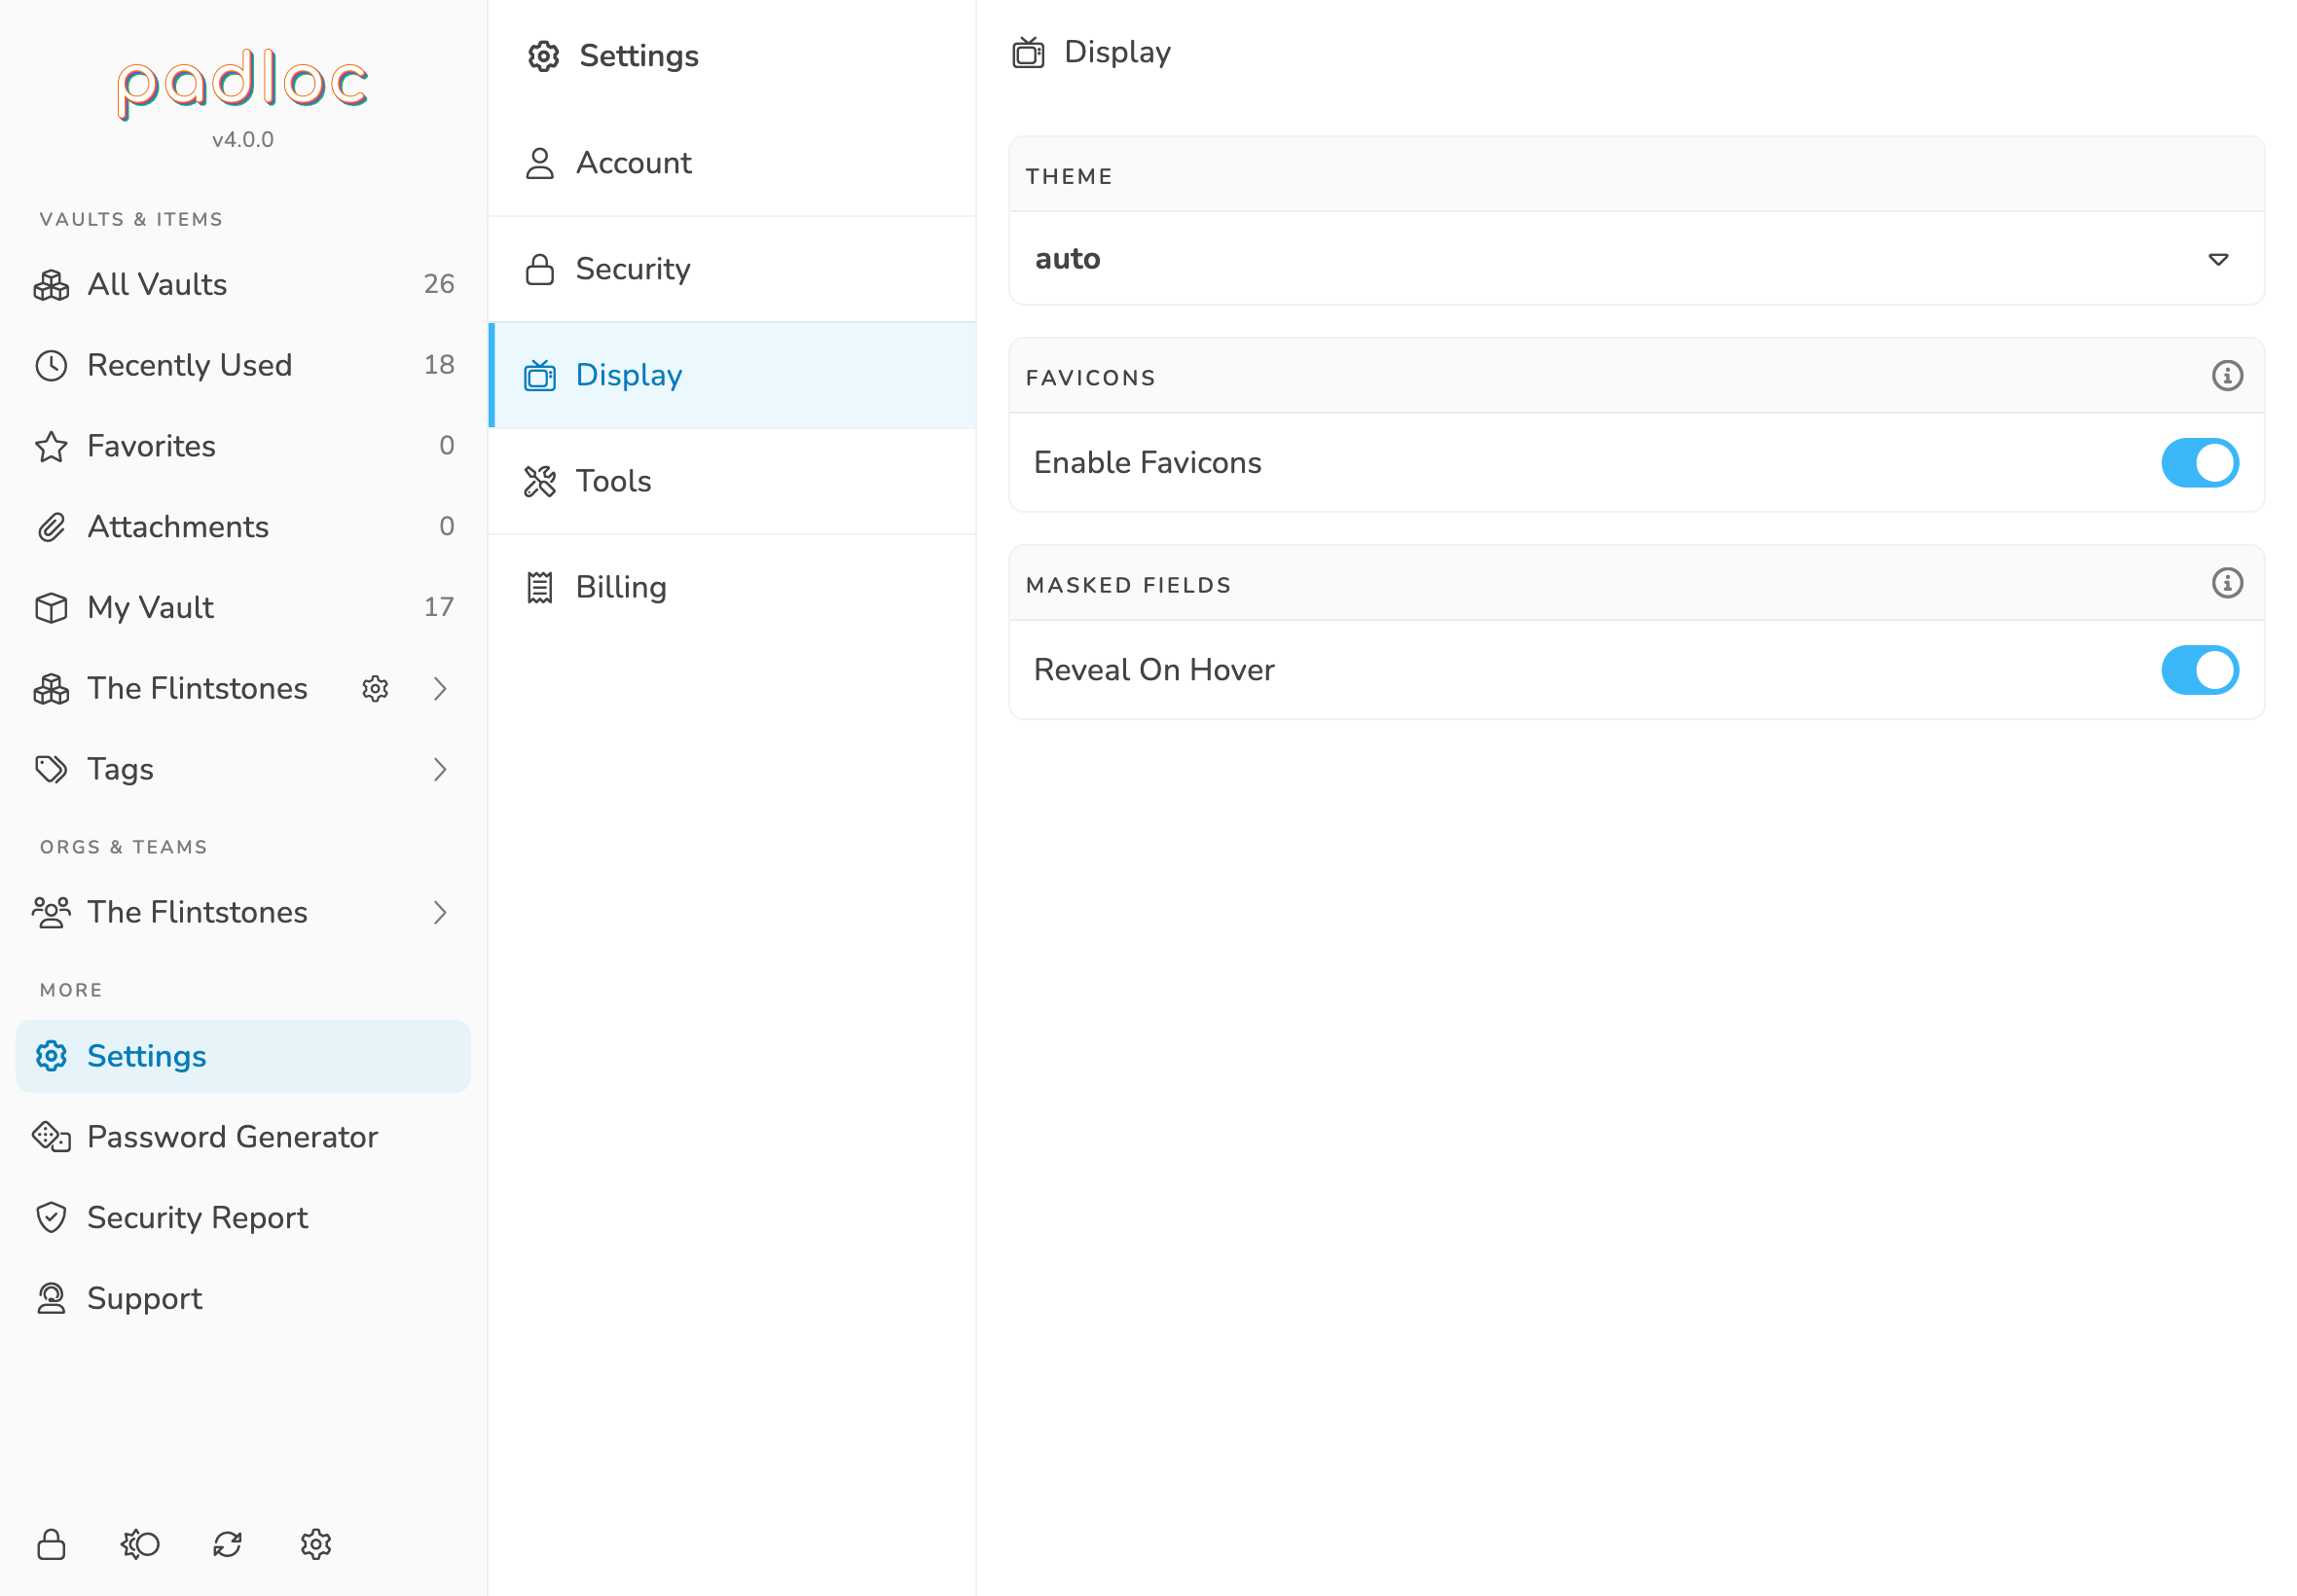
Theme
The cool kids are all about dark mode these days, and Padloc now has a dark theme as well 🥷! To change the current theme, go to the display settings, then select the desired theme from the dropdown in the box labeled "Theme". Currently you can choose between 3 options: light and dark, which are self-explanatory, and auto, the default. Setting the theme to auto will select the preferred theme based on the settings of your browser and operating system.
Did you know? You can also switch between themes by clicking the on the bottom of the main menu! (And a little bird told me that you can do the same on this very page 😎)
Favicons
Padloc can use the URLs fields stored in your vault items to find and display website icons for them. You can disable this behavior by deselecting the button labeled
Reveal Masked Fields On Hover
If is enabled, masked fields such as passwords or credit card numbers will be unmasked when you move your mouse over them. Disable this option if you would rather use an explicit button.
Tools
Importing Data
Padloc provides an easy way to import data from other applications. Supported formats are:
-
Comma Separated Values (CSV) - Many applications support exporting data in this format, and Padloc provides a powerful import assistant that should allow you to import data from pretty much anywhere that allows exporting to CSV.
-
Encrypted Padloc Export - Lastly, Padloc has its own, encrypted export format which naturally is supported and recognized automatically. Encrypted Padloc Exports are protected by a password which you'll have to provide during the import process.
Here is how to import data into Padloc:
- Go to /
- Click
- Select the file you want to import.
- Padloc should automatically recognize the file as a CSV file and select the appropriate format. If it is an Encrypted Padloc Export, you'll now be asked for a password. If you're importing a CSV file you can now configure the CSV import options.
- Select the you want to import the data into.
- Click to complete the process.
CSV Import Options
CSV files are a fairly open format, and their structure can vary significantly depending on where you exported them from. In order to properly process the data in your CSV file, Padloc needs some additional info from you.
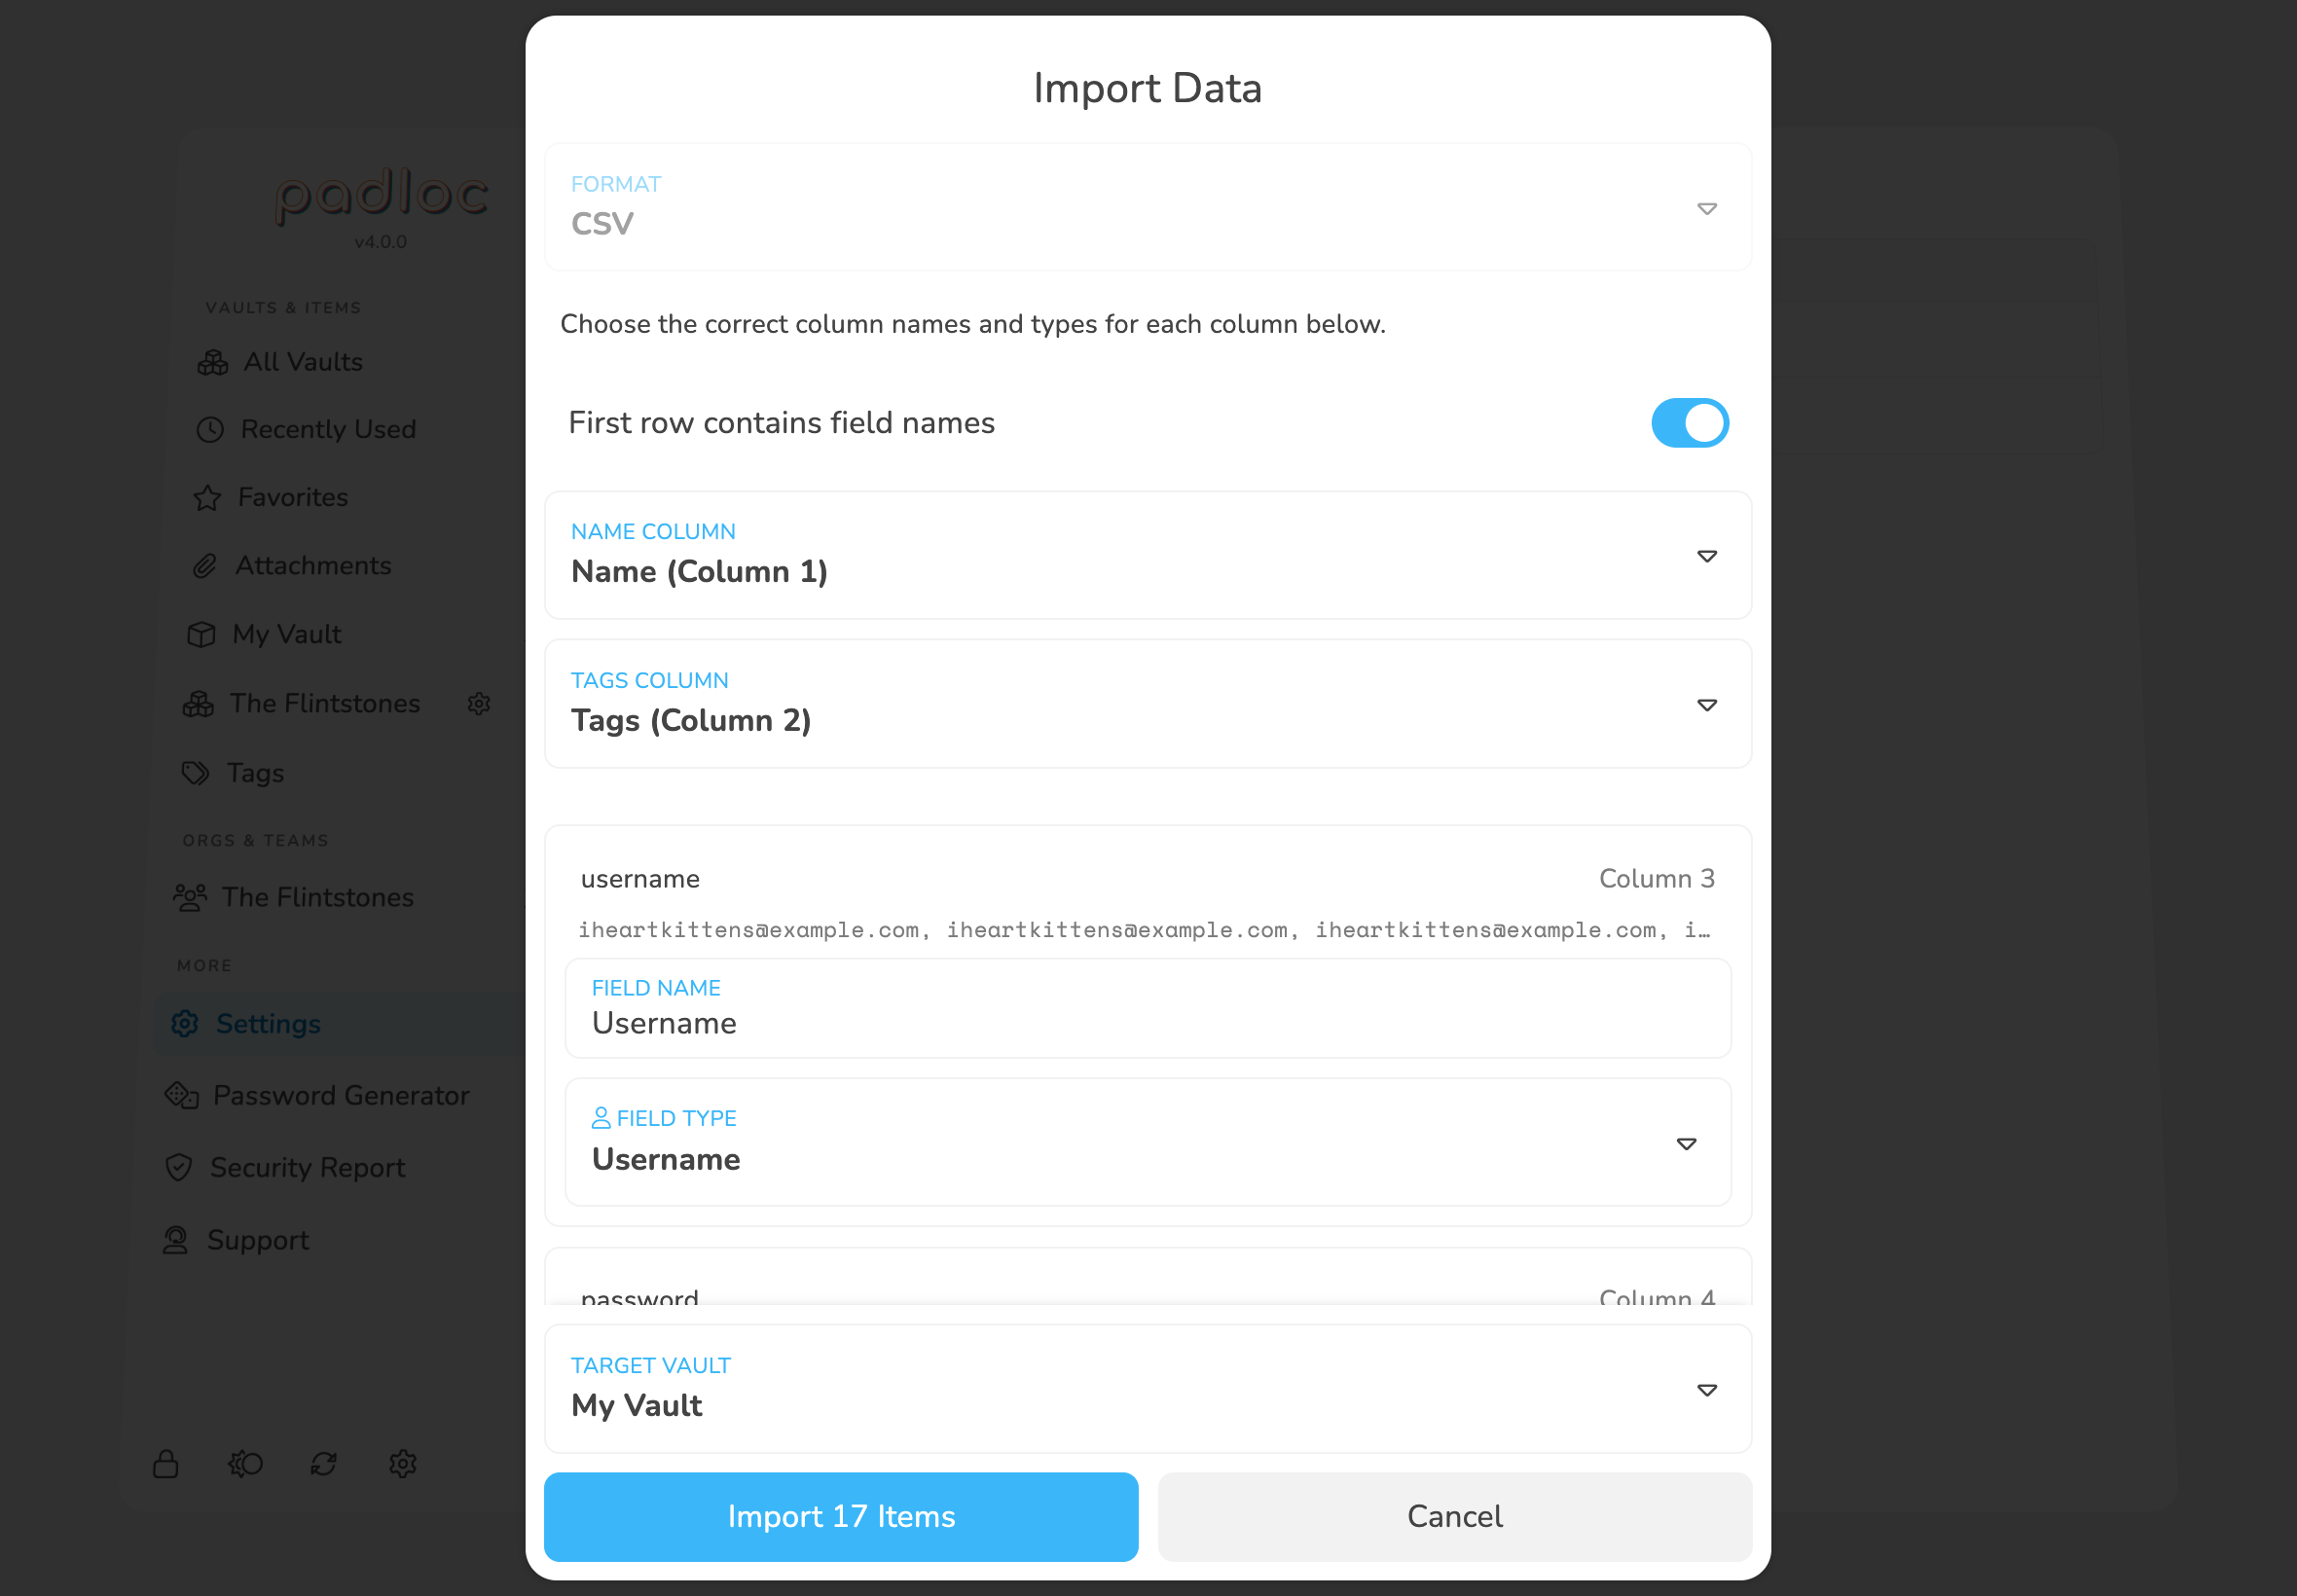
1. Does the first column contain field names?
The first line in a CSV file is commonly used to label the columns in the file. If present, this information is helpful for Padloc to determine the name and tags columns, as well as properly naming fields. If the first line in your CSV file does not contain field names but actual data, you can disable this option via the button. When in doubt, it's usually best to leave this option on.
2. Pick the name and tags columns
In addition to regular fields, there are two special properties that are treated specially. Padloc will try to determine the correct columns for these automatically, but you still have the option to adjust this manually.
The name column is where the item name is stored. This is usually the first column. This is the only column that is required for a successful import.
The tags column determines which column should be used for tags. This column should contain a comma-separated list of tag names. If the application your importing from doesn't not have a suitable equivalent for Padloc's tags, you can set this to None.
Note: Other applications may have a similar concept to tags, but under a different name like "categories" or "folders". These may still be usable as tags, as long as they're formatted as a comma-separated list.
3. Adjust field names and types
Based on the structure of the CSV file and the information you provided in the previous steps, Padloc will detect and extract all additional columns and interpret them as fields for your vault items. Again, Padloc will do it's best to automatically determine the correct name and type for each field, but we recommend still checking these so you can make adjustments in case we got something wrong.
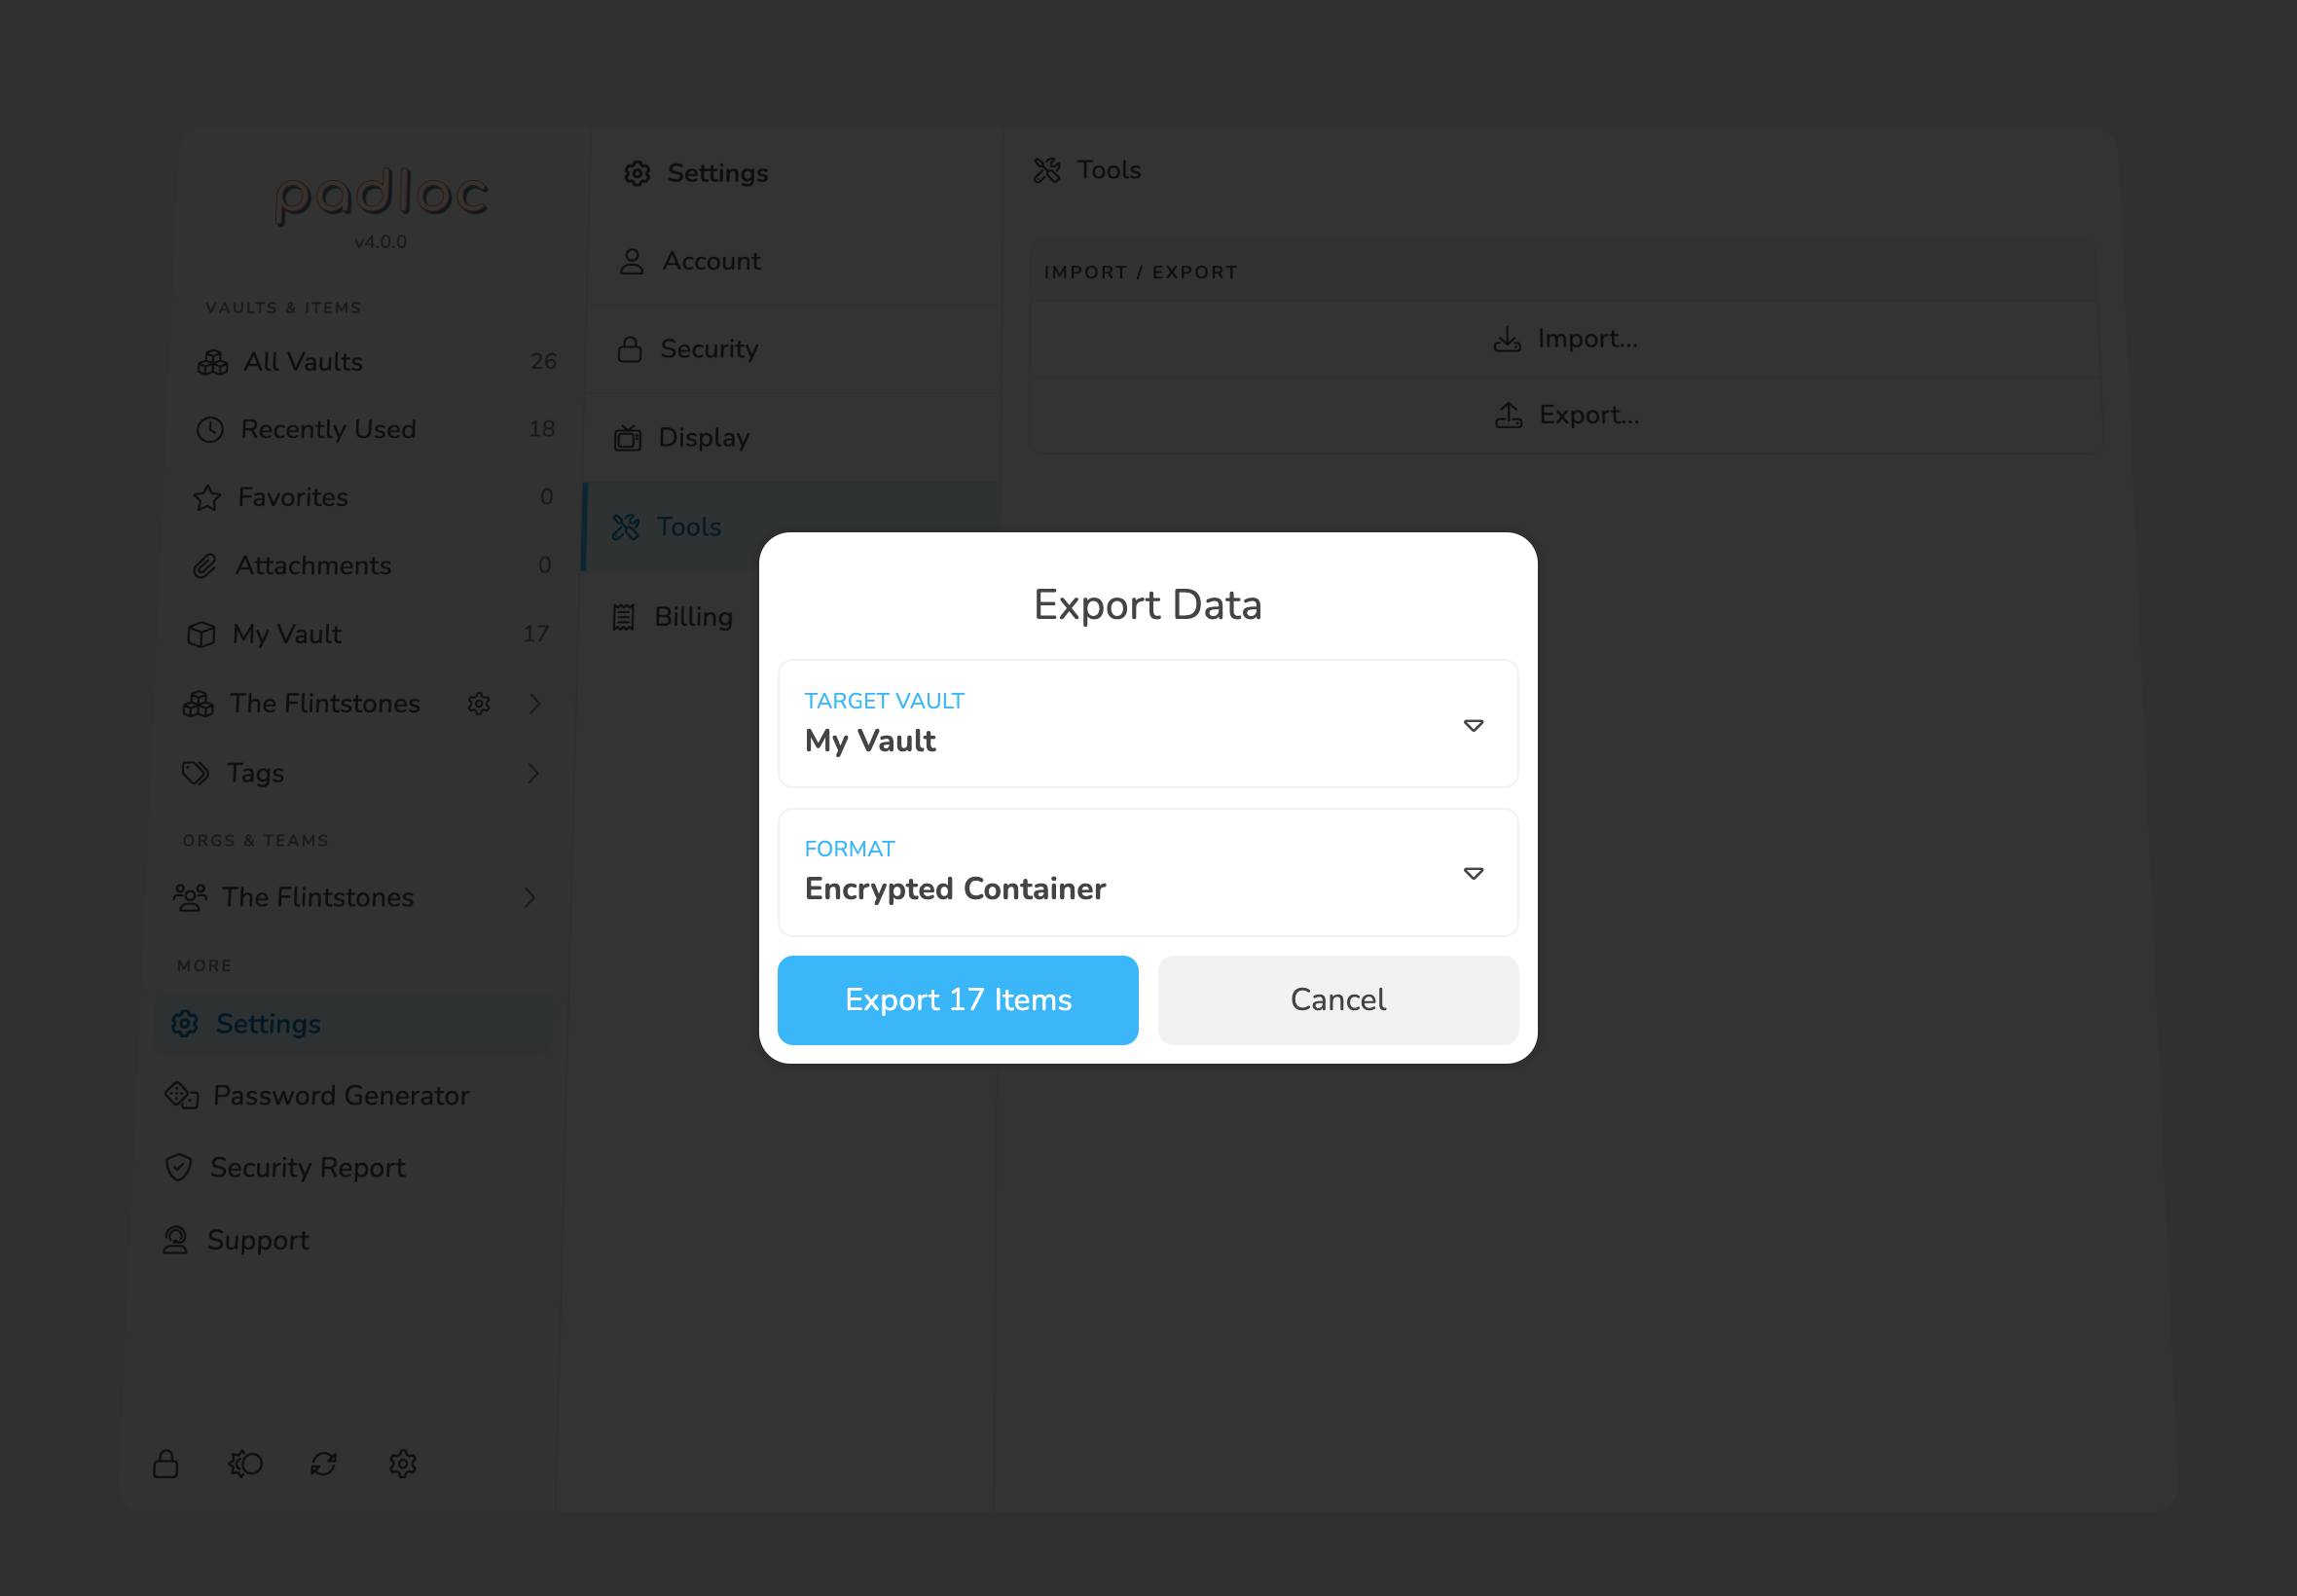
Exporting Data
Here is how you export your data from Padloc:
- Go to /
- Click
- Under ,
choose the vault you'd like to export. You can also choose All Vaults,
which will create export files for all vaults at once and bundle them in a
.zipfile before downloading. - Under , select Encrypted Container or CSV.
- The button at the bottom of the dialog will indicate how many items will be exported. Click it to continue.
- If you chose the Encrypted Container option, you'll know have to enter a password to protect your data. This does not have to be the same as your master password but should be sufficiently strong. The app will warn you if you choose a password that is considered too weak.
Warning: Exporting to CSV format will save your data without encryption of any kind which means it can be read by anyone. We strongly recommend selecting **Encrypted Container** instead.